

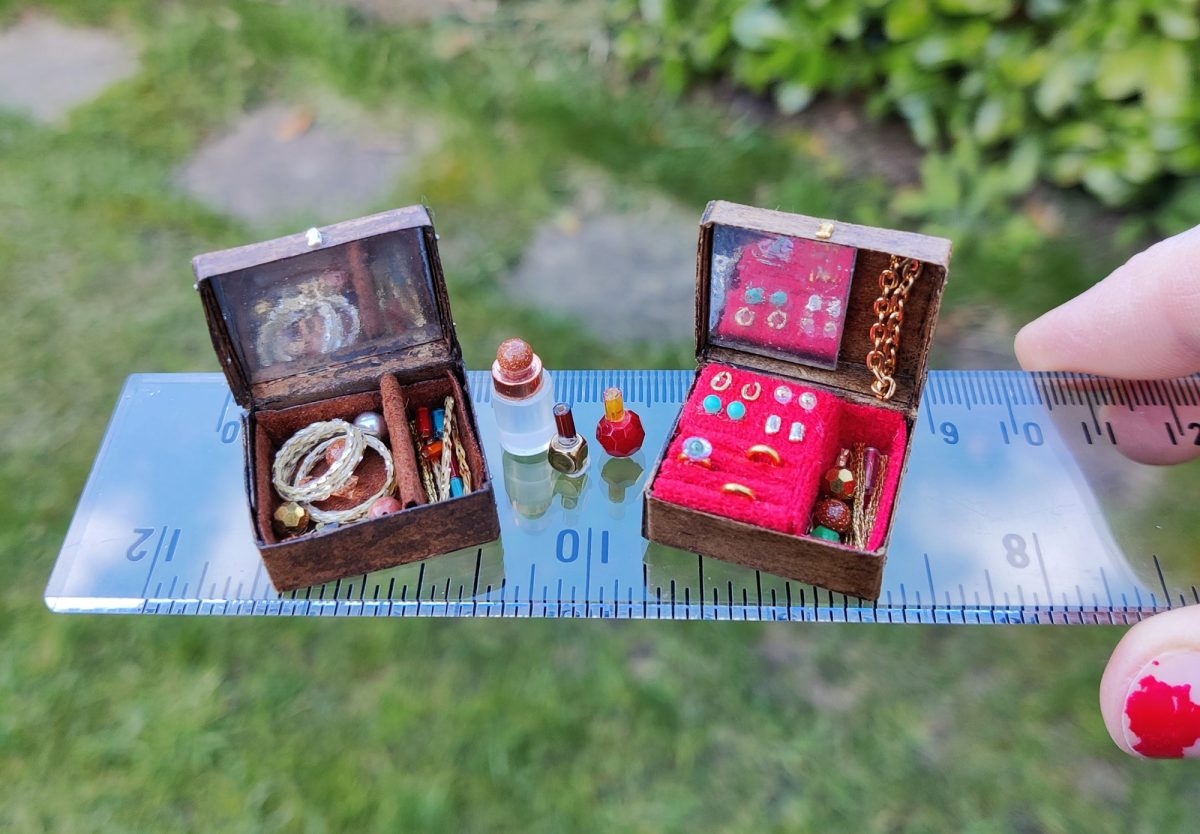
This weekend I’ve been making a miniature jewellery box (actually two!). The middle of last week I sent a reworked draft of my latest picture book dummy off for agent review, and next week I’ll start work on a new story idea, so I wanted to do something completely different and absorbing for a few days as a break.
I didn’t have much of a plan, and I didn’t take many photos in the beginning phases, as I didn’t really expect them to turn out as cute as they did.
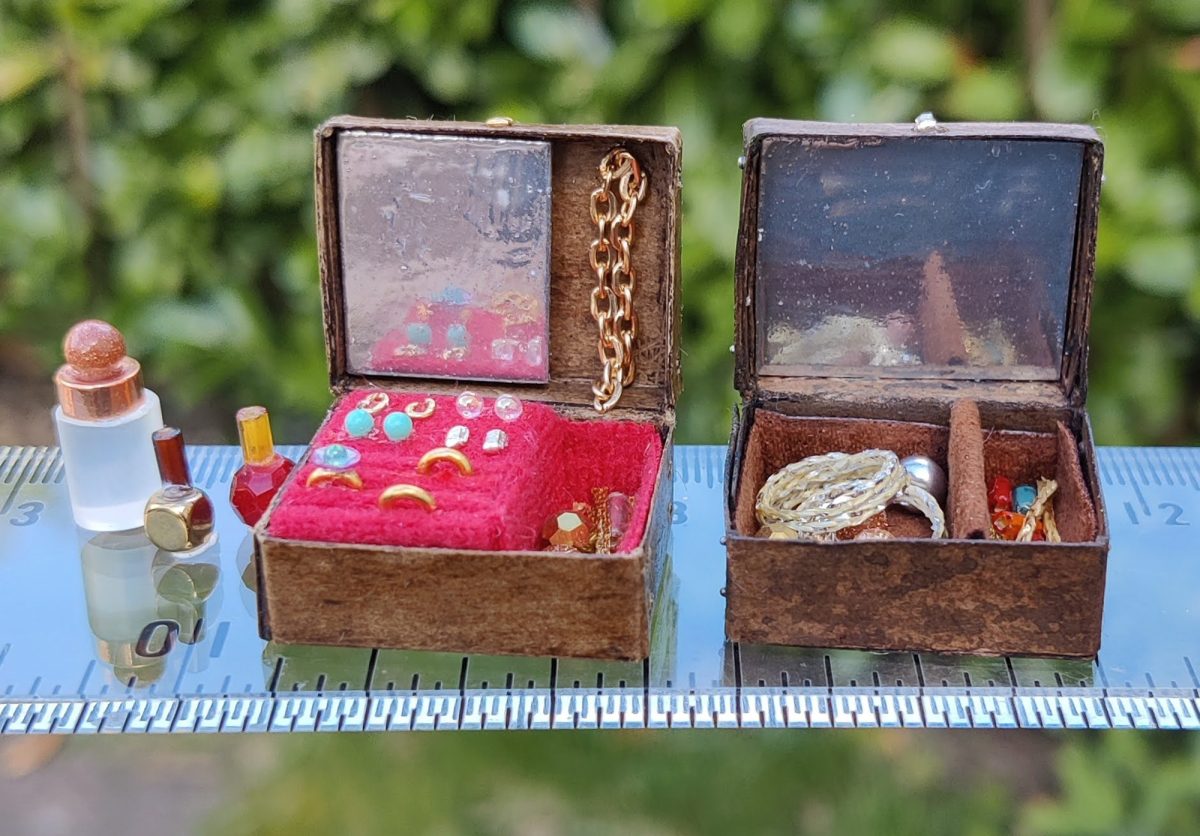
I was going to make the wooden container from cereal box, but lucked out and found this square tube of packaging the exact dimensions I needed. (I just looked up jewellery boxes for sale online until I found the sort of size I wanted and then divided the dimensions by 12 to get the mini size.)

I cut the carboard tube to the full height of the box and then created the hinged lid simply by cutting though only three sides and folding the top back. I then cut and glued squares of cardboard for the lid top and box bottom. I first tried painting my tester box with brown ink, but it didn’t look great and even warped a little. so I used coloured wax instead (I have it for waxing full size wooden furniture. It’s called Briwax and the colour is dark oak.) This has a lovely colour and buffs to a slight sheen with no need for an extra sealer.
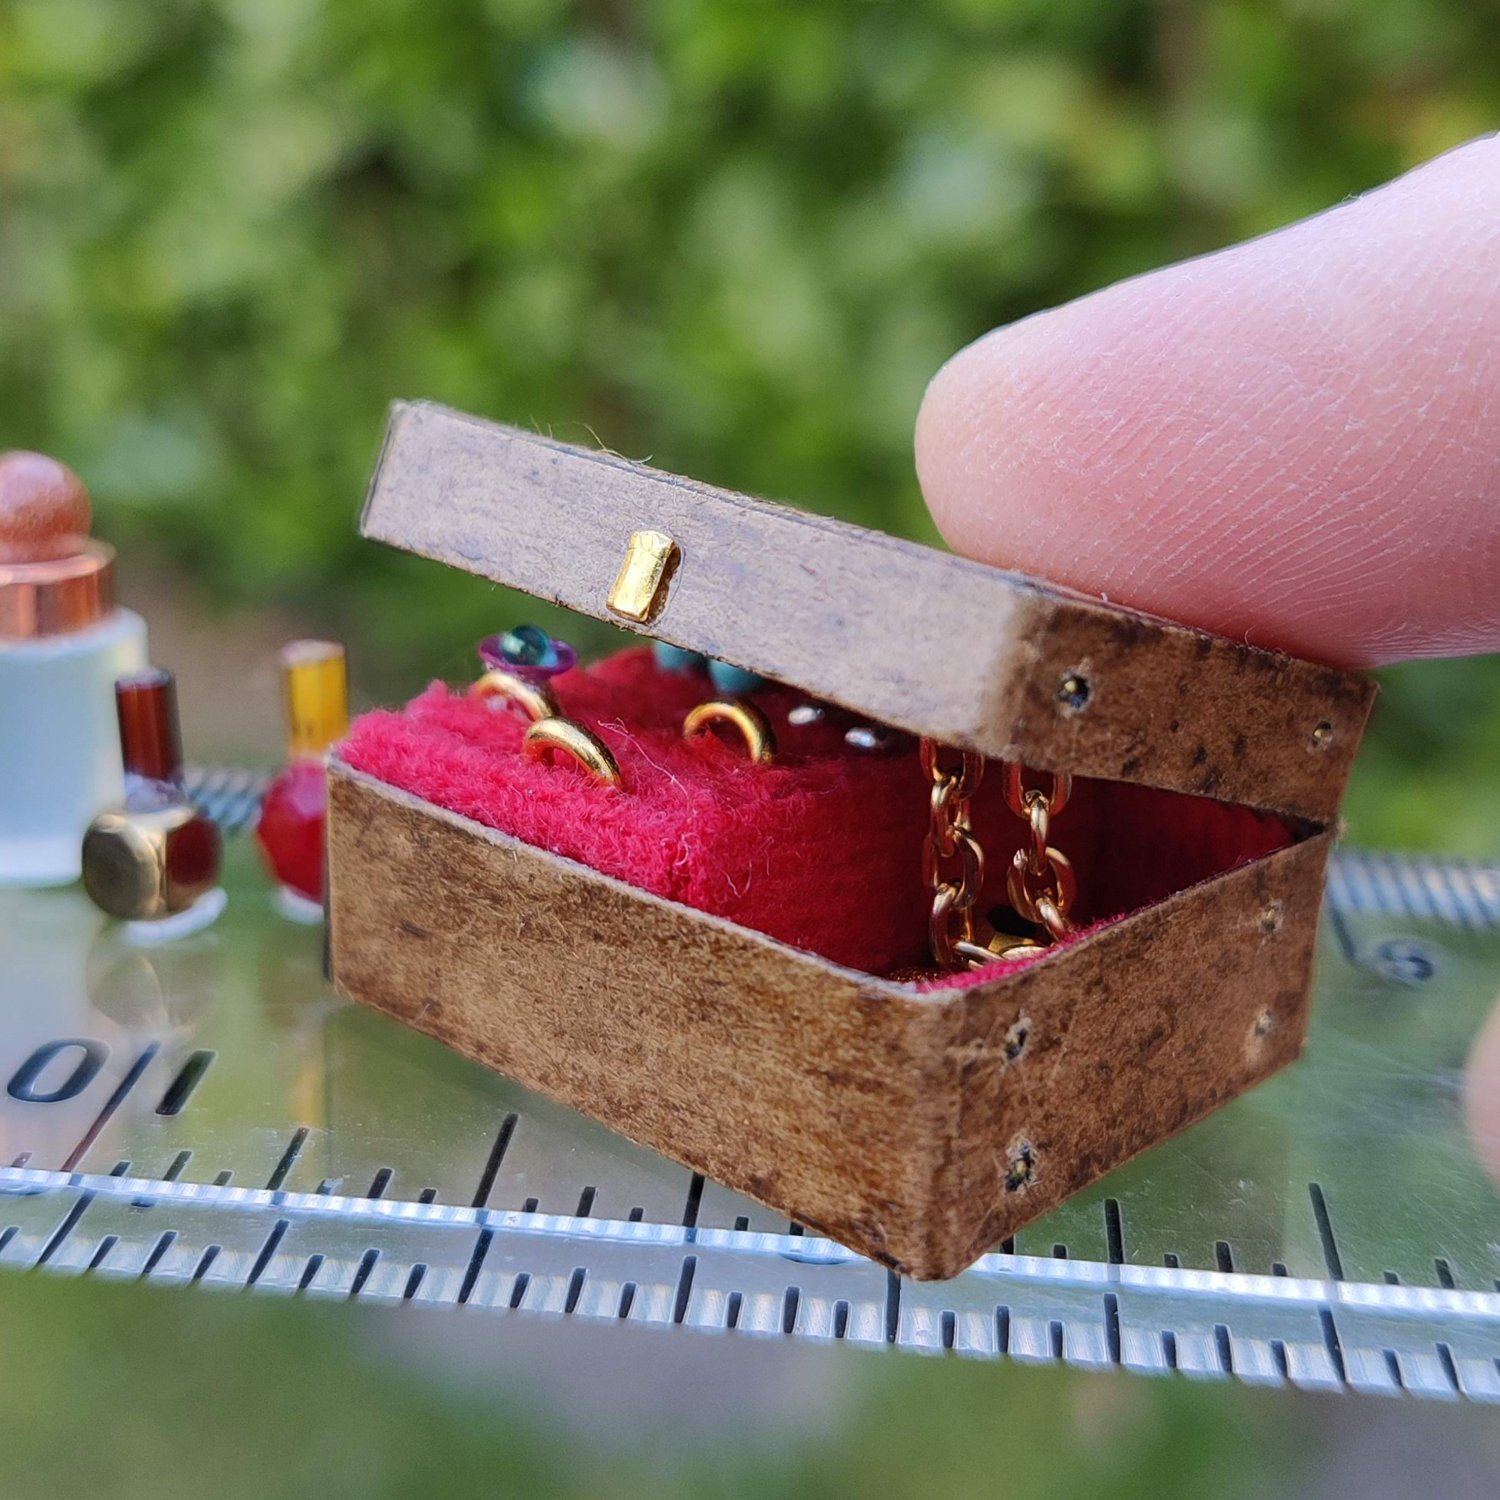
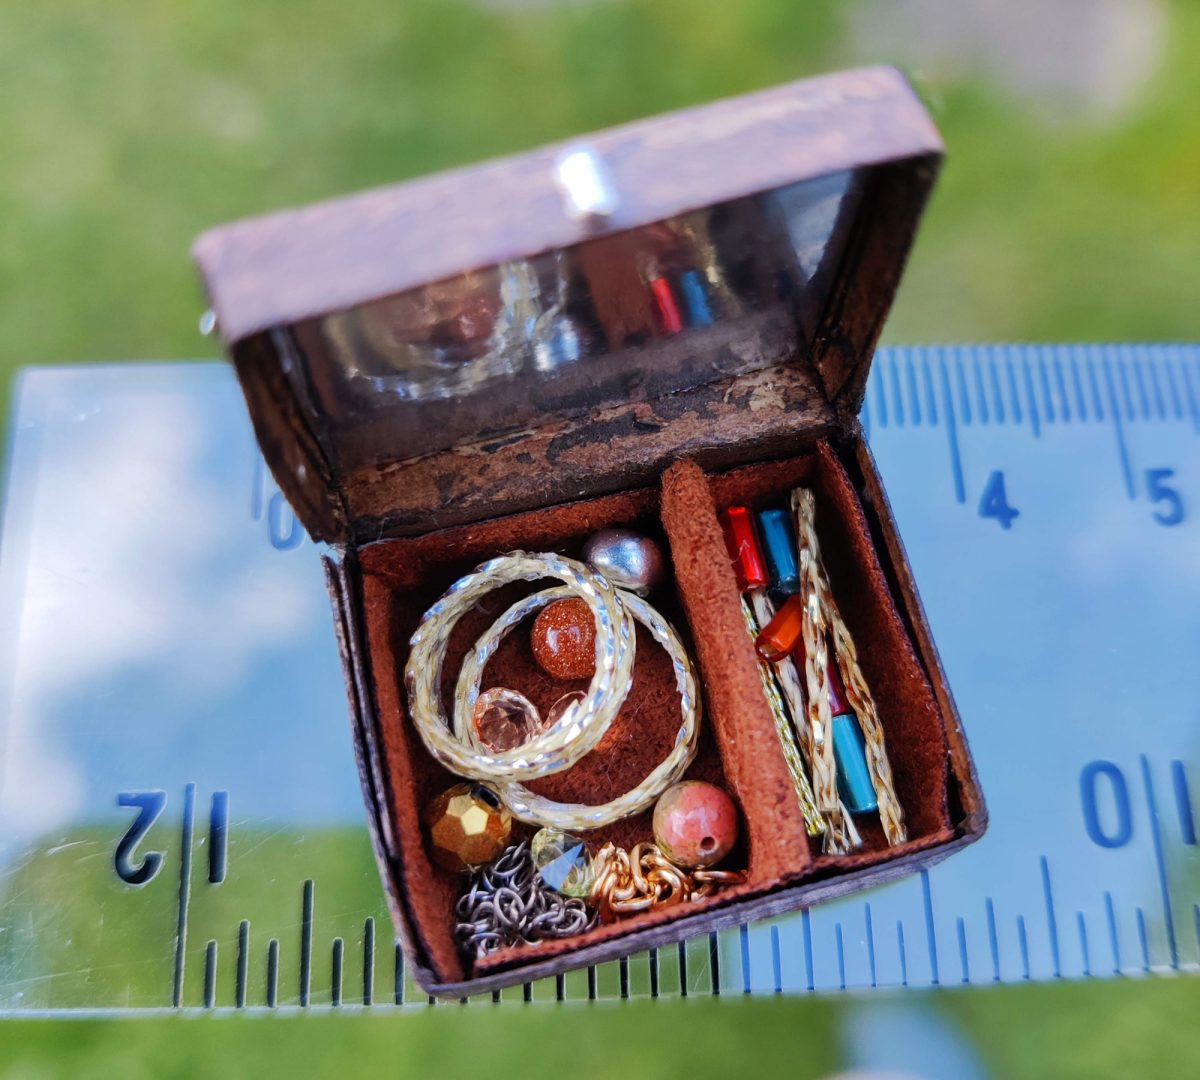
My first thought to line the box was red felt, but that was way too thick so I dug out some brushed cotton type stuff instead. I wanted sections for rings, earrings and other stuff, so I glued scraps of red fabric to small pieces of card and assembled them in the box.
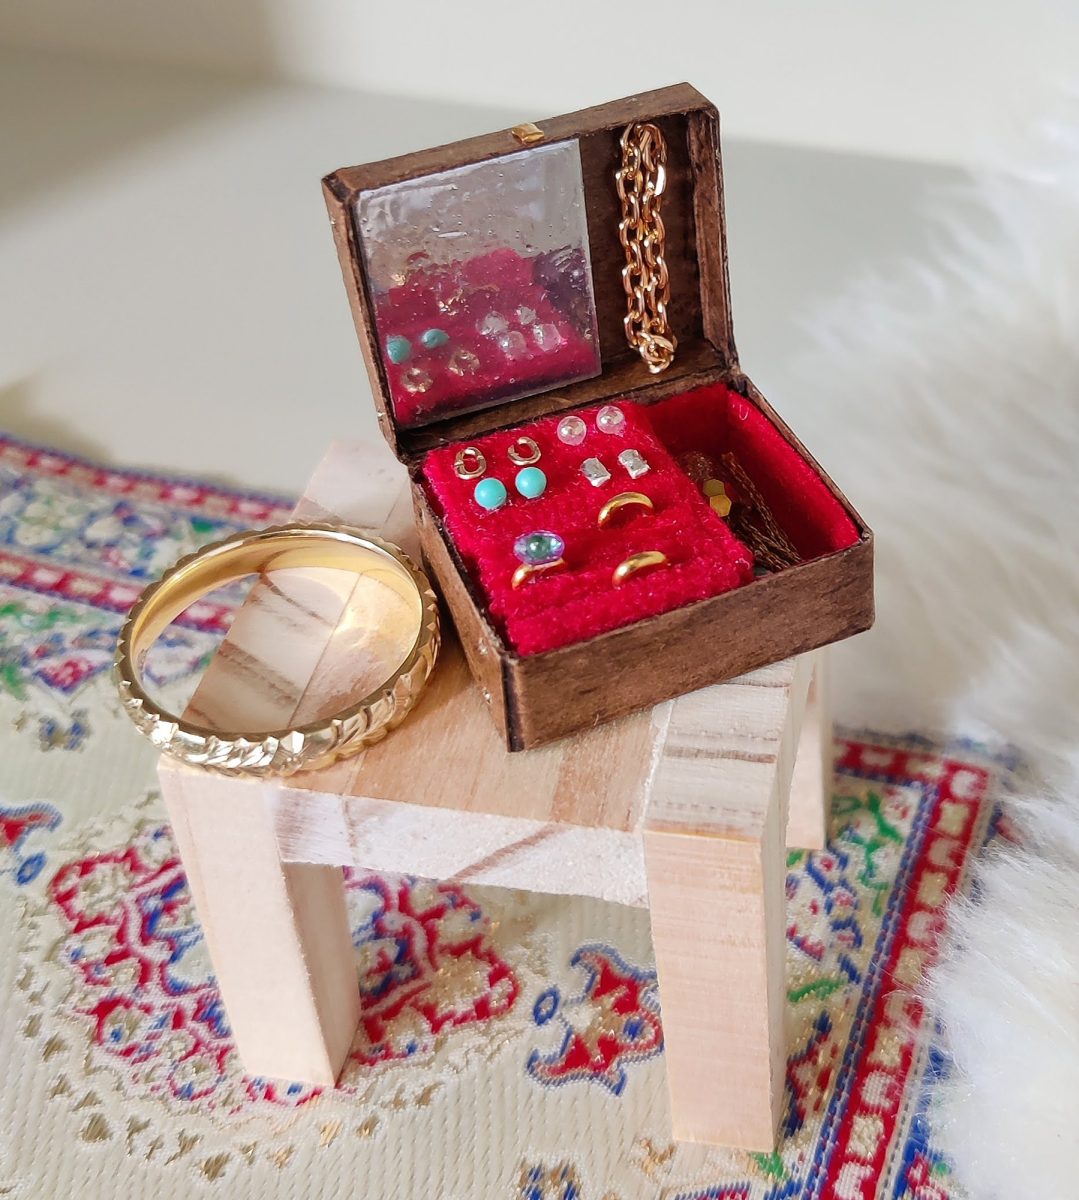
I knew I wanted a mirror in the lid, but couldn’t find anything shiny enough in my random stash of card. Then I remembered this chrome pen!
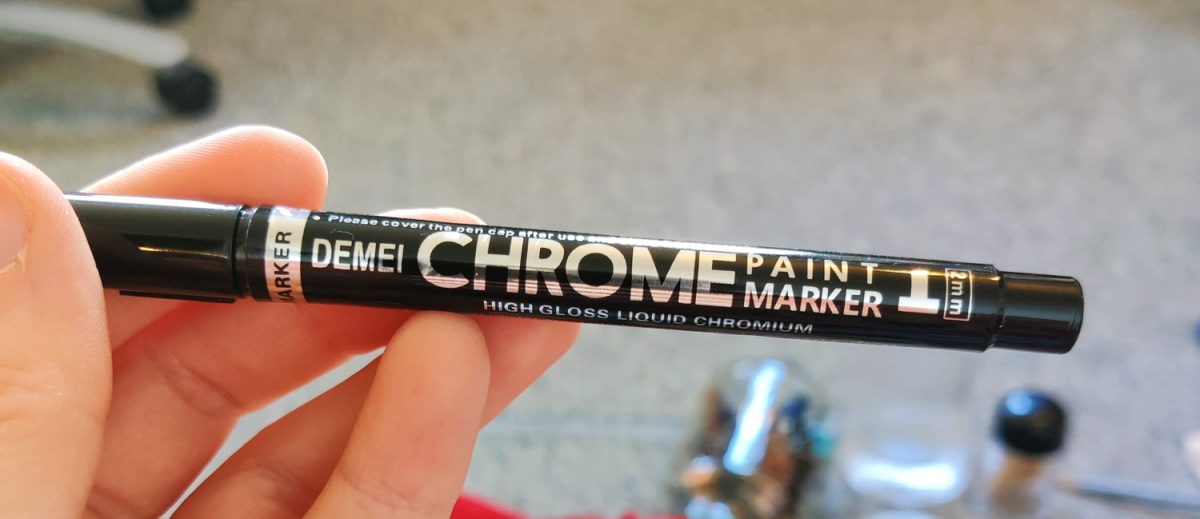
I must have tried a hundred different metallic pens and pencils over the years. They have all been extremely underwhelming, until I found this! It is super shiny and metallic, it flows well and goes on easily, but doesn’t spill or bleed. I was so happy to be able to make little mirrors just by using this on squares of card. Sadly, I found that, even when dried overnight, any handling of the mirrors left fingerprints and dulled the surface. They would work as very old and worn mirrors, but I wanted shiny so I made a new batch and this time sealed with a coat of diamond glaze before handling. This did dull the shine a little and make the surface less smooth, but it was still better than any of my other options so that’s what I went with.
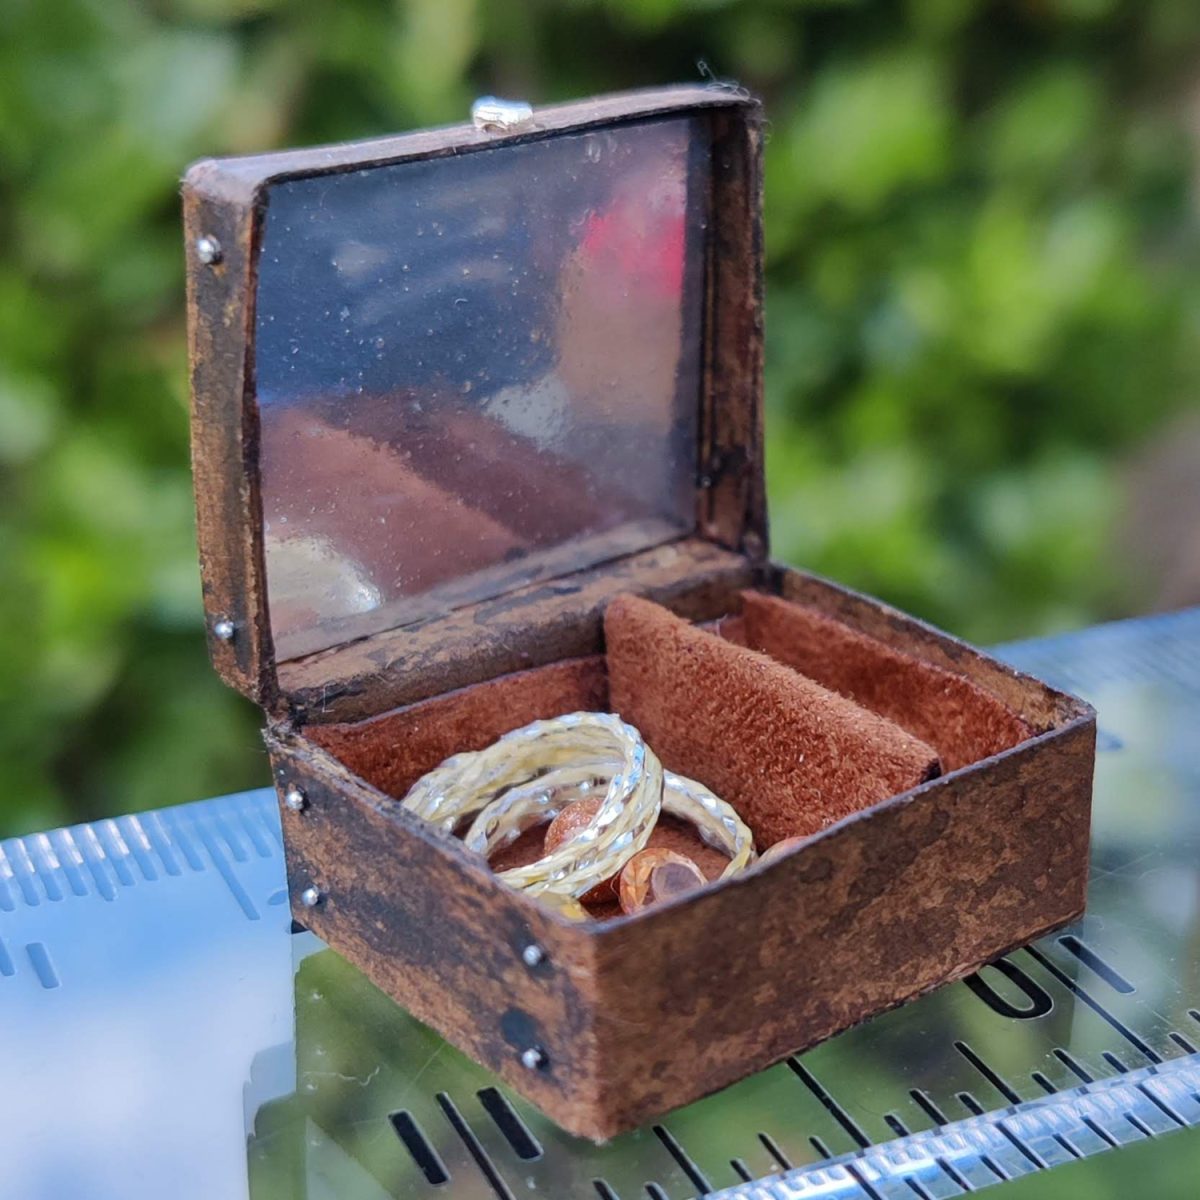
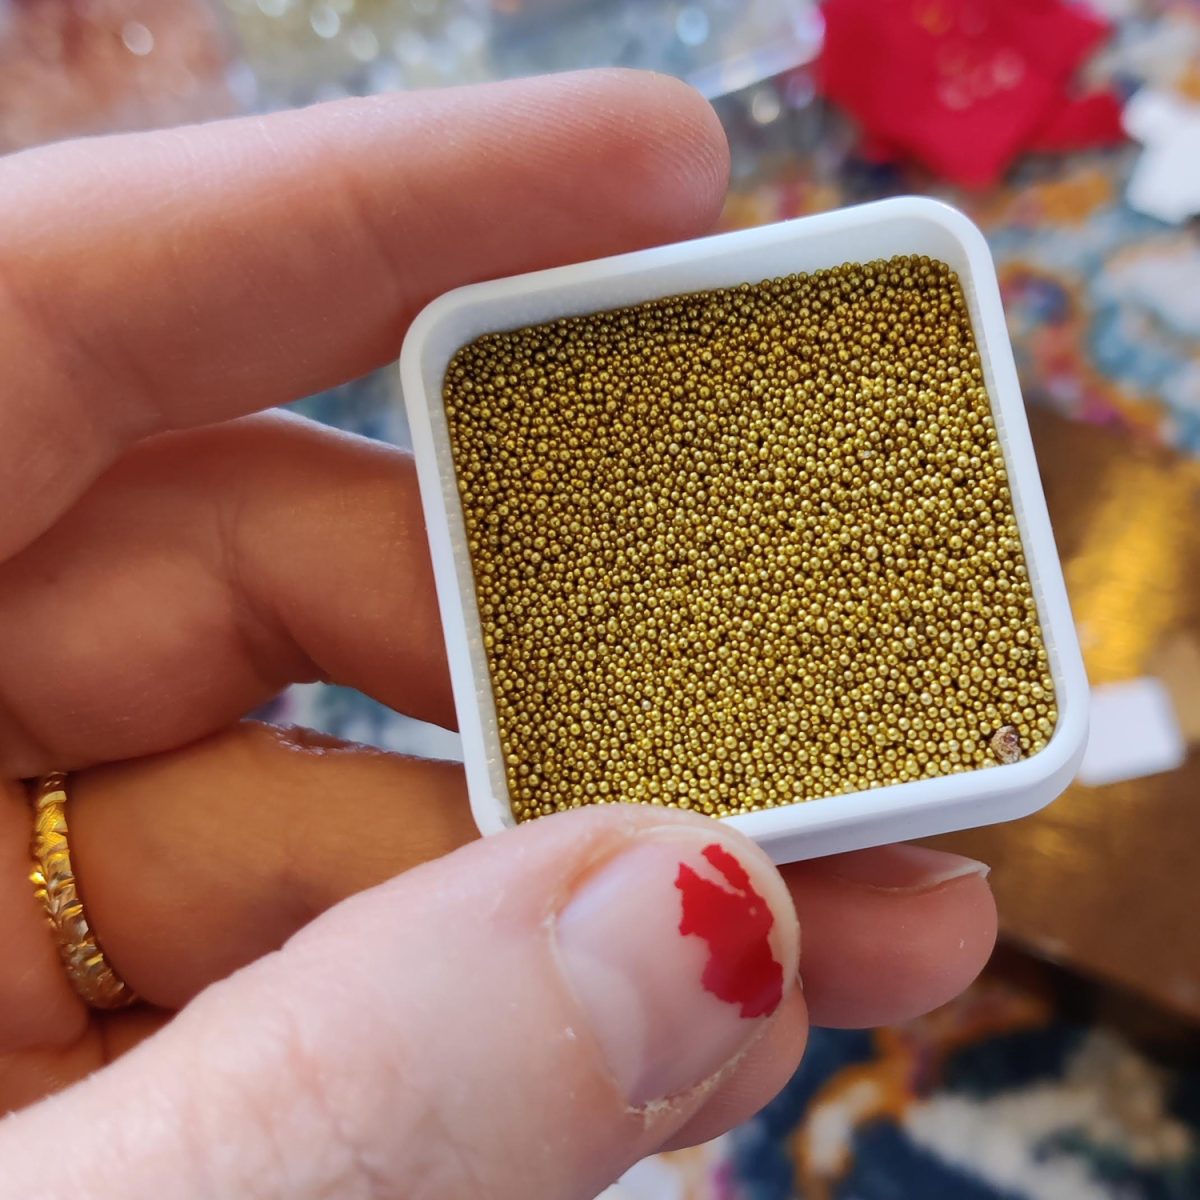
For the outside of the box, I wanted to add nails where the pieces would have been fixed together. On the tester box I tried making holes with a blunt needle, adding a little black paint, and then a metallic caviar bead.
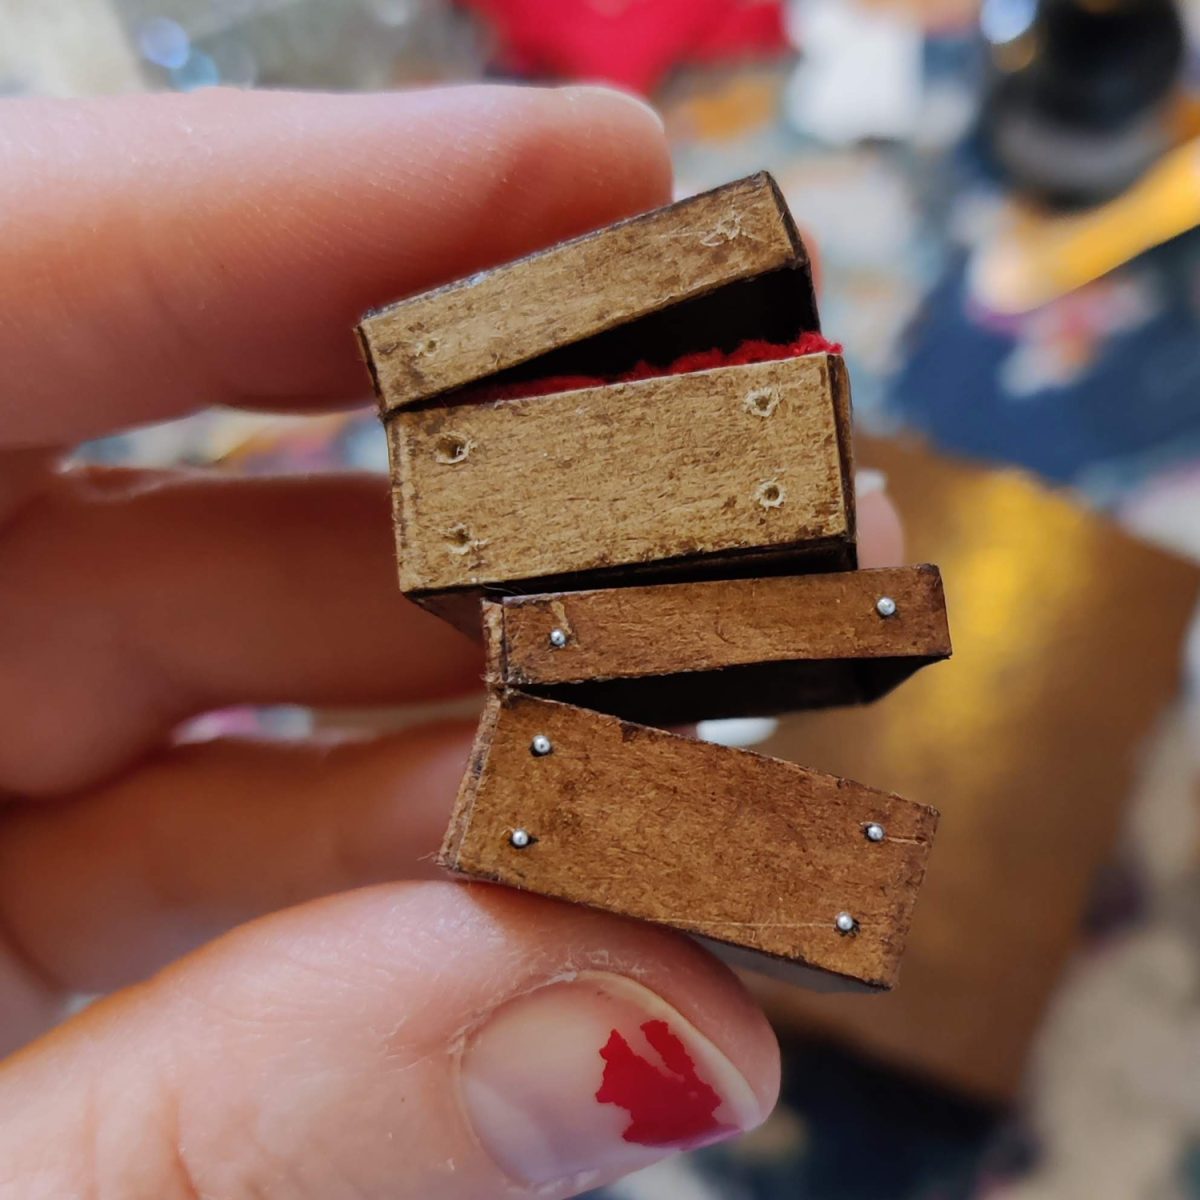
It worked really well, but the “nails” stuck out a bit too much, so on the actual box I made the holes bigger and used the smallest caviar beads I could handle with tweezers to have them flush with the side.
I also added a catch to the lid, made from a squashed crimp bead.

The most fun part of this project was creating the jewellery to go inside the box. The earrings are pairs of tiny plastic beads (bubbles?), chain links, and squashed crimp beads.
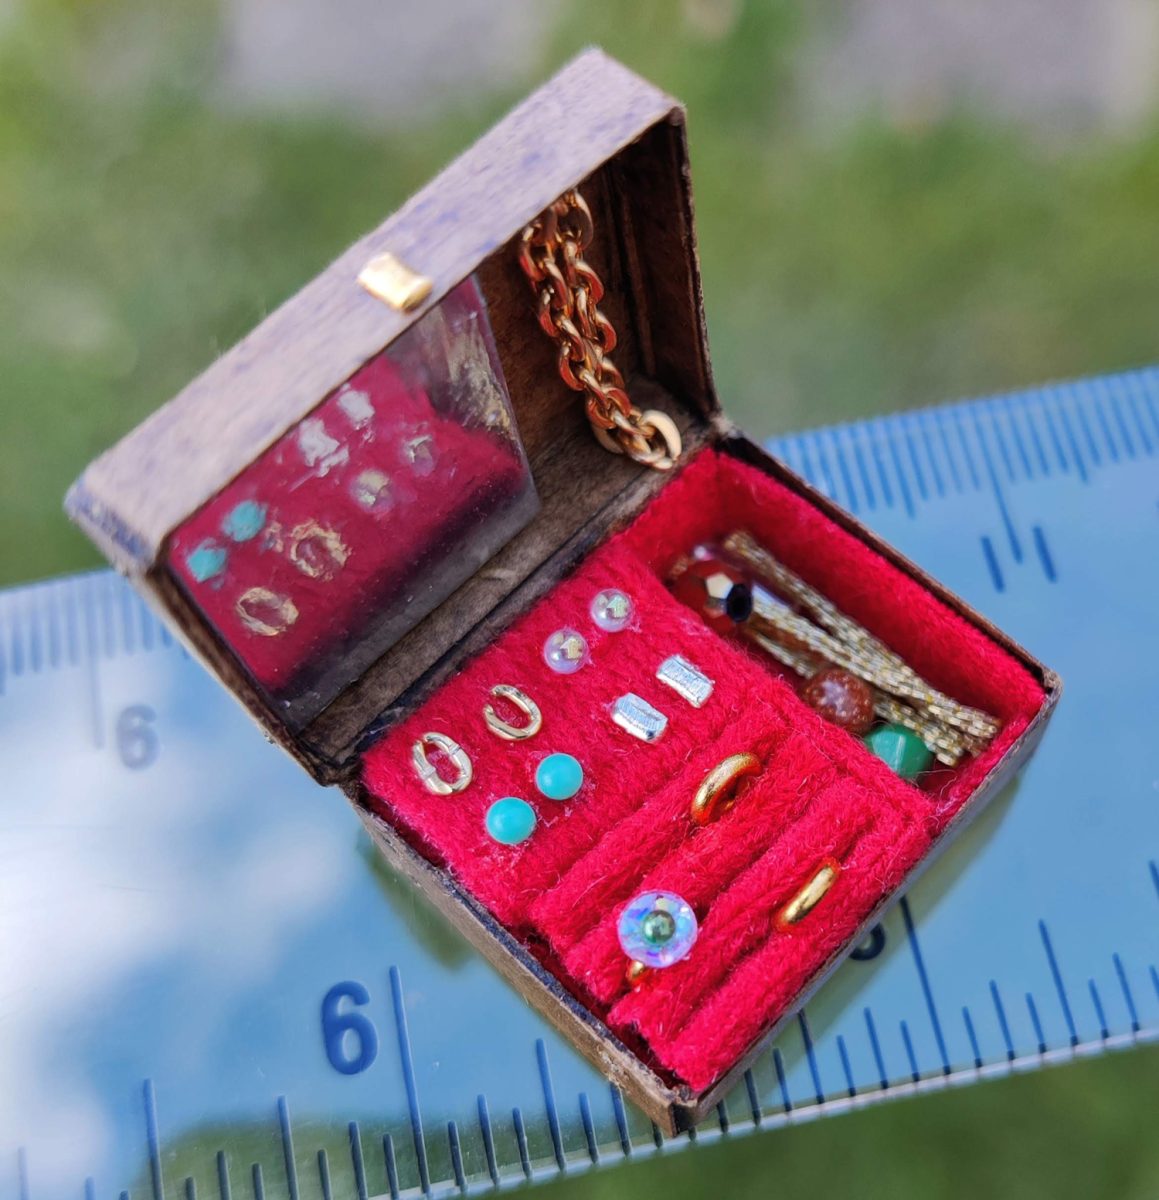
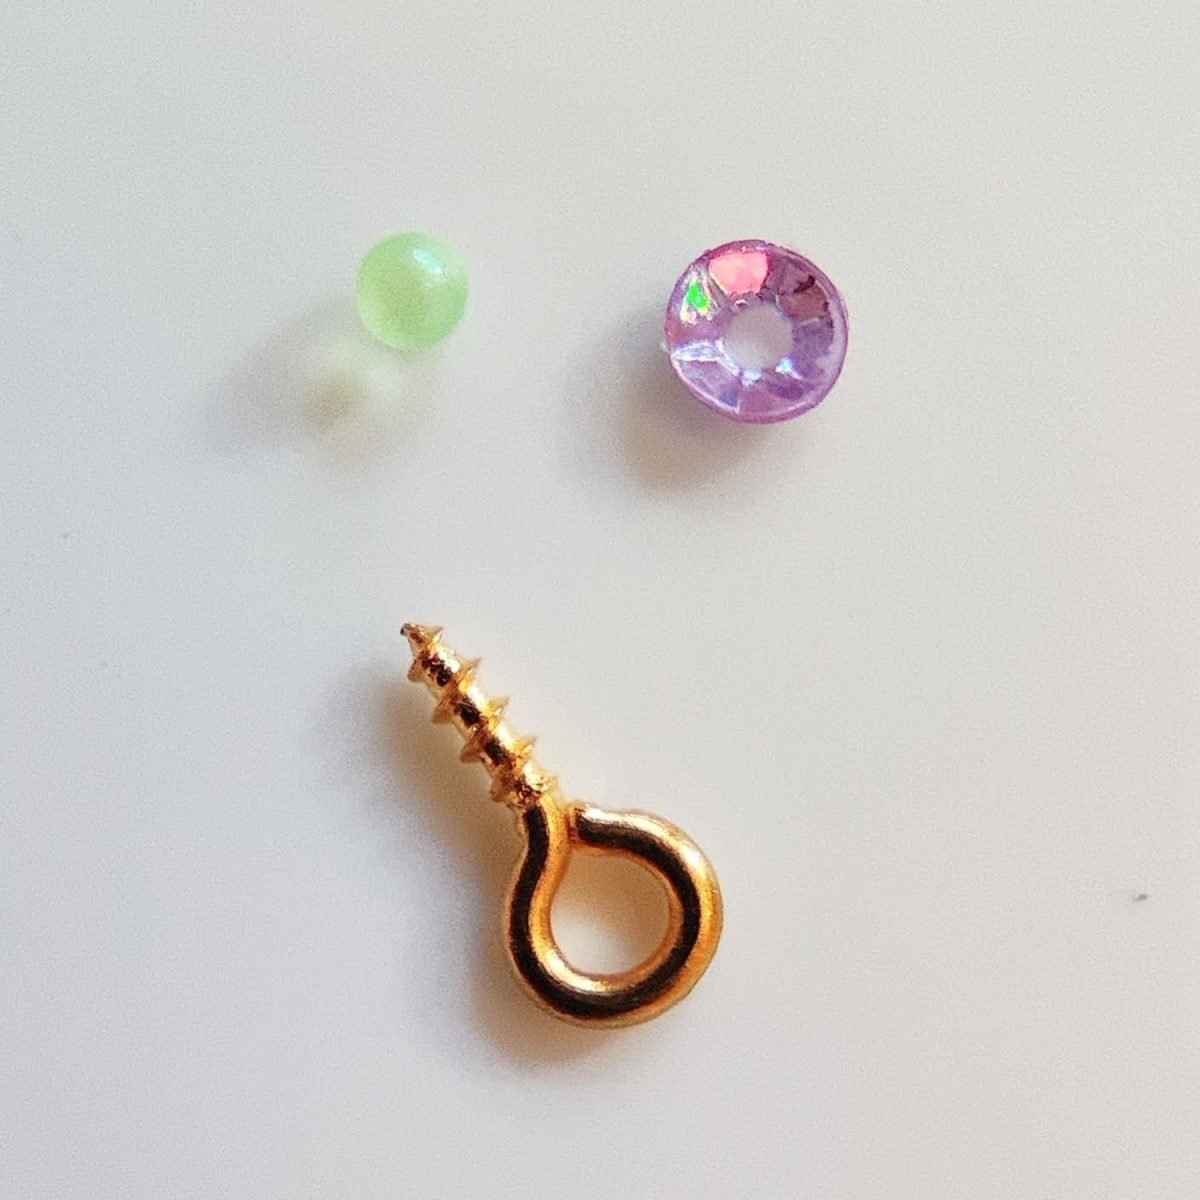
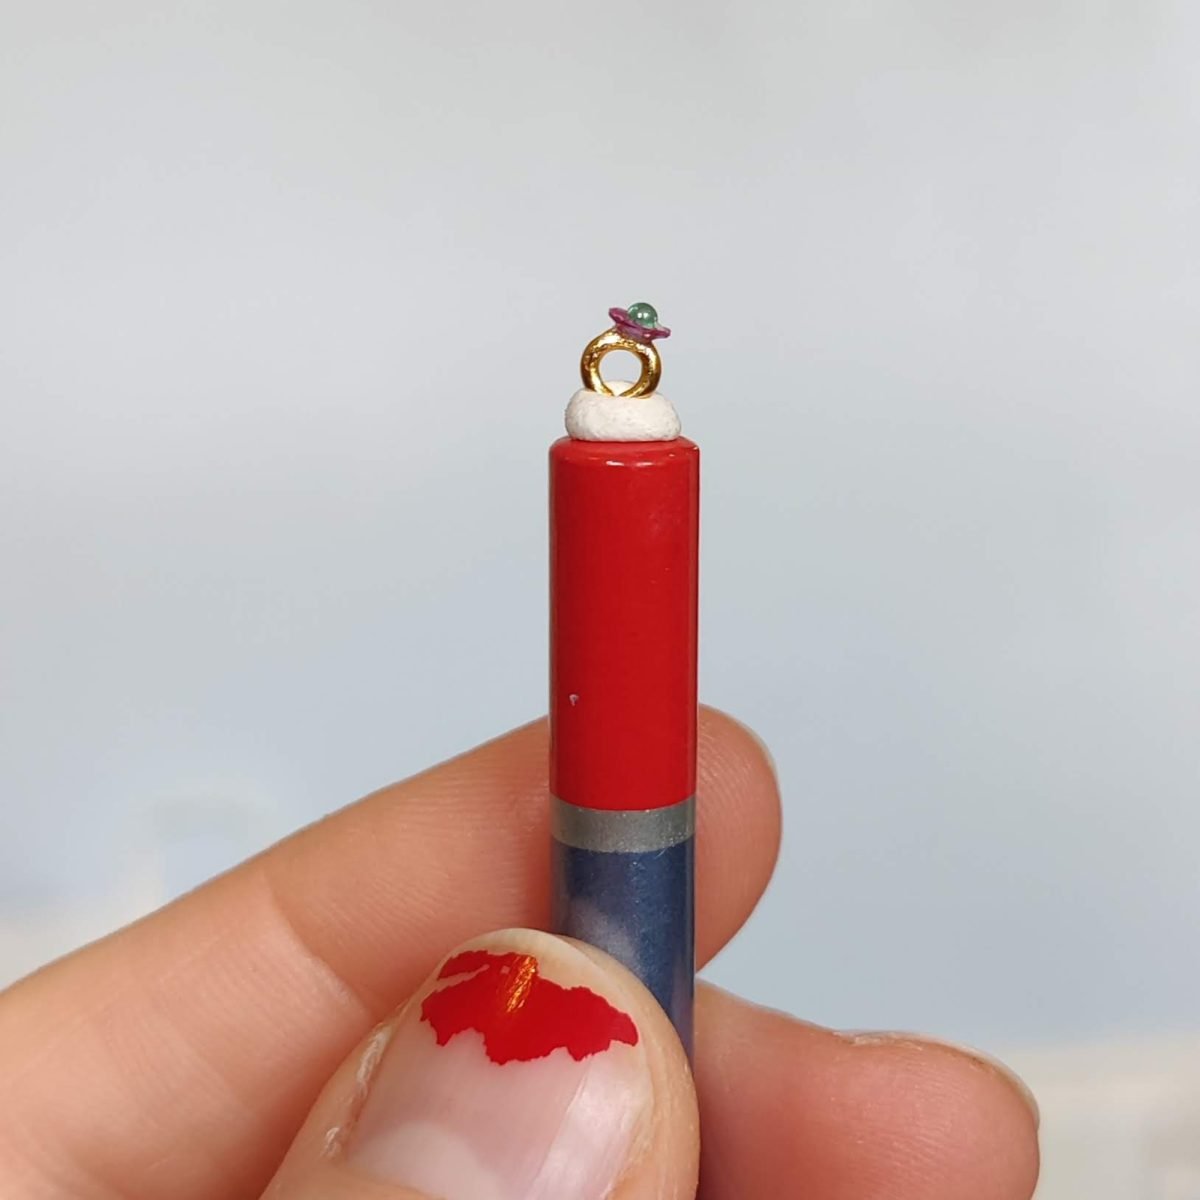
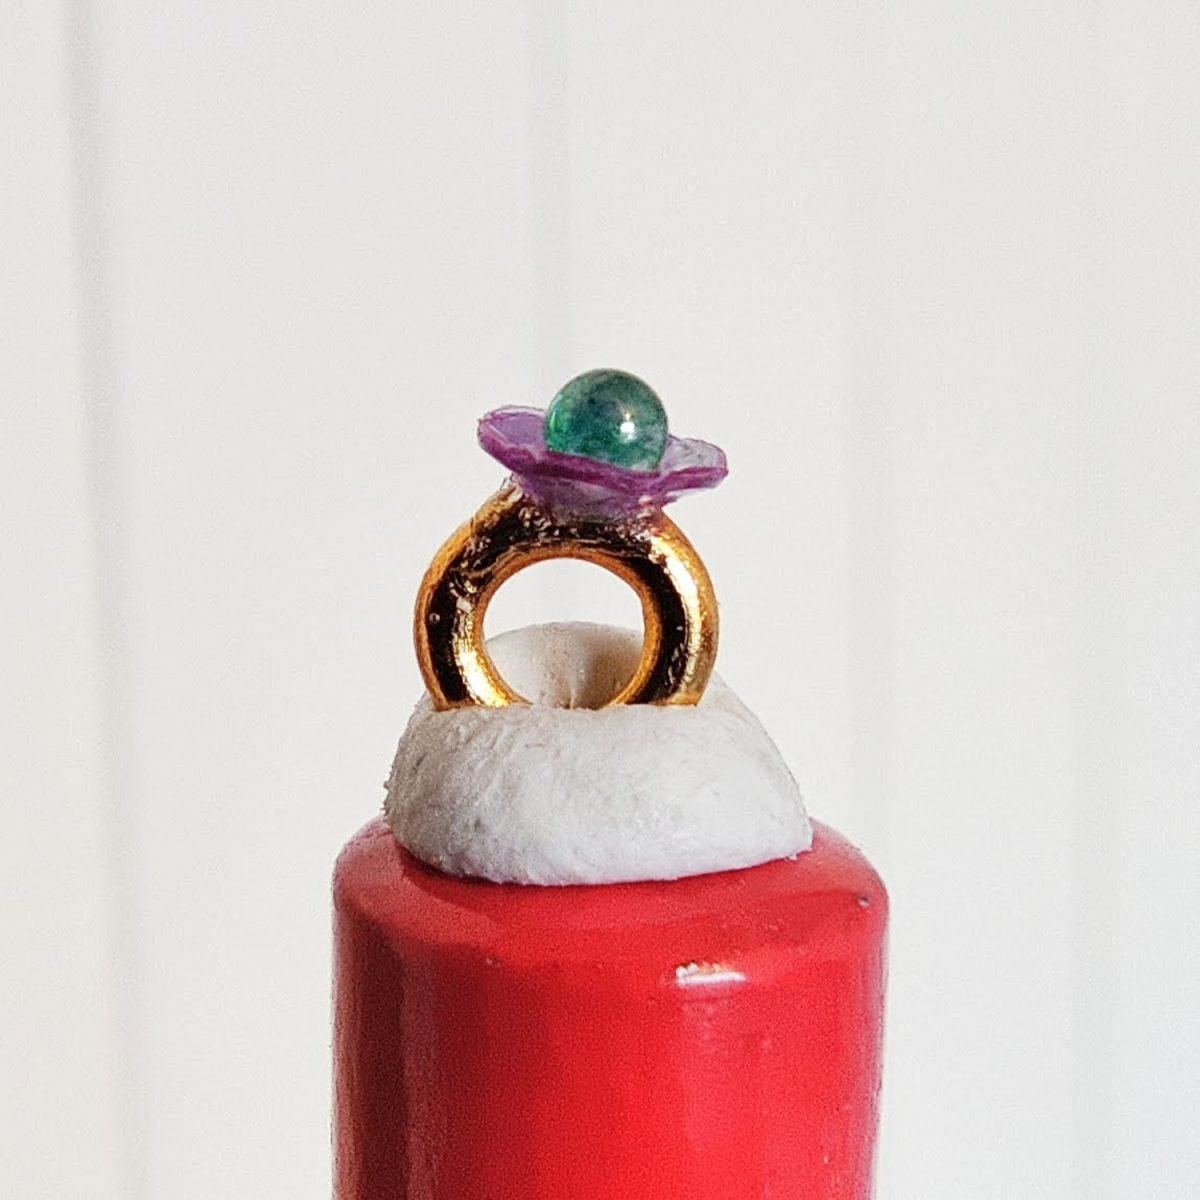
The rings are tiny eyelet hooks with the screw part chopped off. I made two plain rings and a fancy precious stone ring by gluing on a sequin and another tiny bubble bead. The rings are a little large to be 1:12 scale but they look fine just sticking out of the box.
The rest of the jewellery is more abstract and just pieces of metallic cord or crochet cotton, as well as small beads. The tester box has two larger open compartments and so I made some bangles by soaking a length of metallic crochet cotton in PVA glue and letting it dry wound around a paintbrush handle.
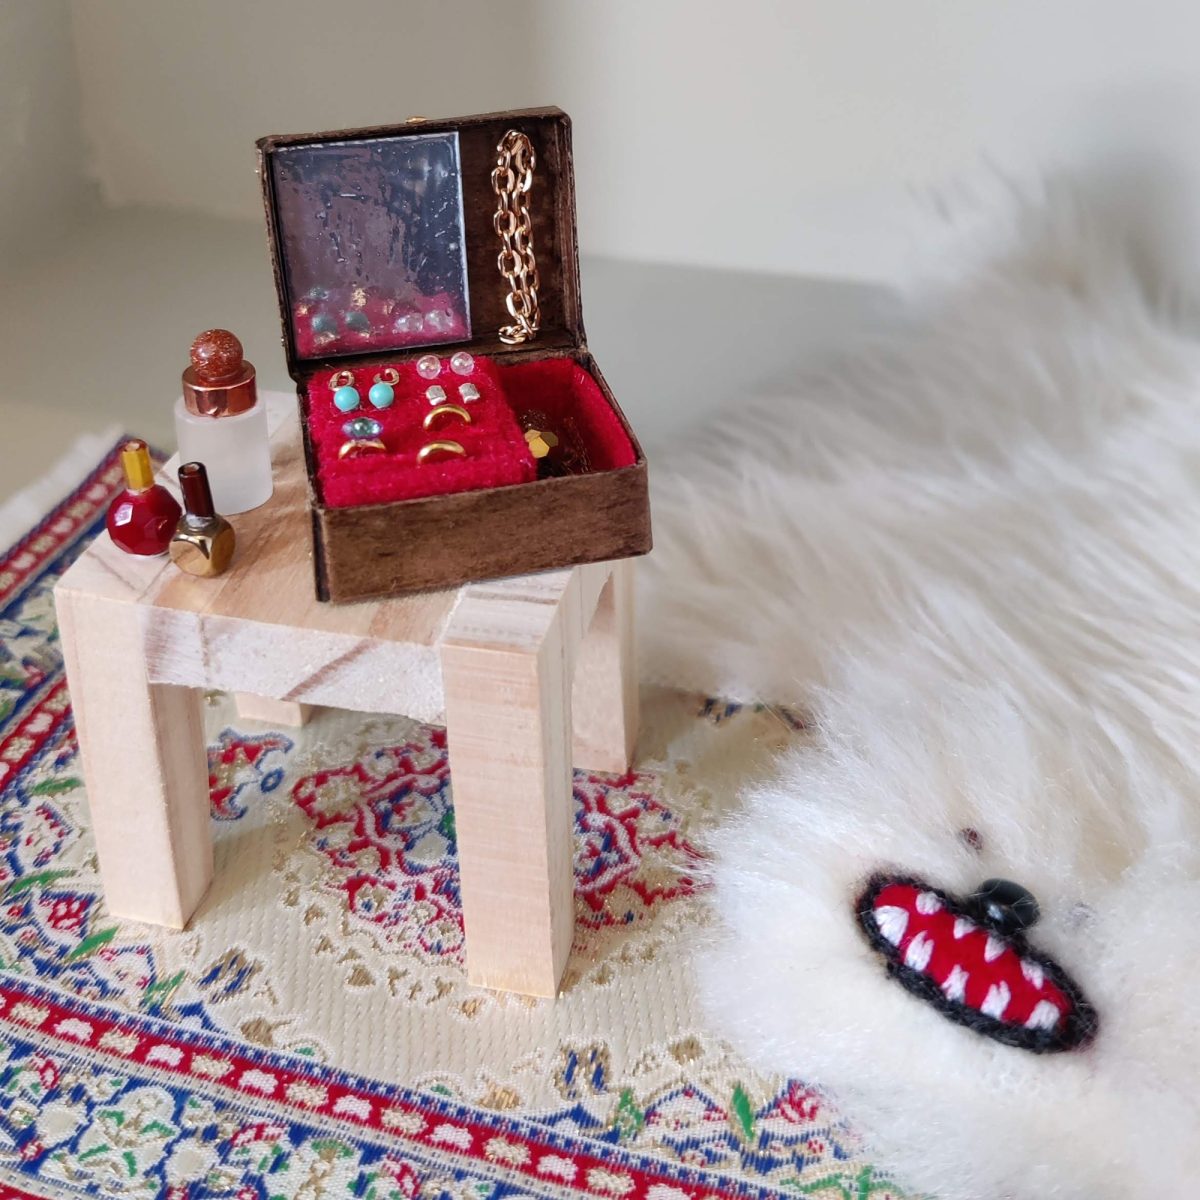
And the miniature jewellery boxes were done! I’m super happy with them both, but I might swap out the contents of the tester box to make it into either a sewing box, or a coin collection.
Discover more from Nicola Schofield
Subscribe to get the latest posts sent to your email.
I am always blown away by your miniatures! They look amazing!! 🤩